
Procedural Stone Walls, Gates and Bridges in Godot
13 min read
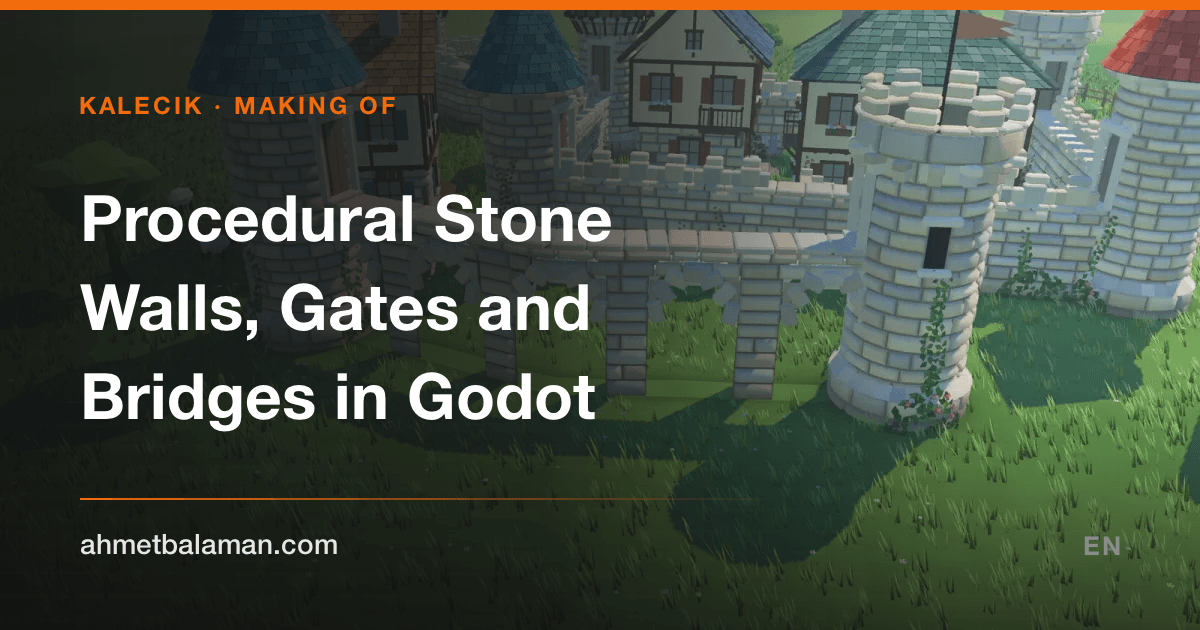
In Kalecik, building a castle starts with a single gesture. You drag your finger across the screen and a stone wall rises behind it, one stone at a time. Make a sharp turn and a tower settles into the corner. Run a cobbled path through the wall and an arched gate opens; run it across a pond and it turns into a bridge. Scribble over an area and that area becomes the footprint of a house. Kalecik is a calm castle and village builder I've been making for iPhone and iPad.
This post walks through how a finger stroke turns into walls, gates, bridges and houses. Let me be upfront: I didn't write the game's code. It was written by Claude Code sessions, AI agents running in parallel. I decided what the game should do, tested every build on my iPhone and fed back what I saw. The full story of how the project ran is in the post about going from an empty folder to an iPhone. The code excerpts below come straight from the game's source (Godot 4, GDScript); I shortened them and added comments.
The pipeline is simple to state: the stroke becomes a clean curve, the curve becomes a path you can measure in meters, and the path becomes stones. After that come towers, the eraser, and the rules for gates, bridges and houses.
From stroke to path: smoothing and WallPath
From a shaky stroke to a clean curve
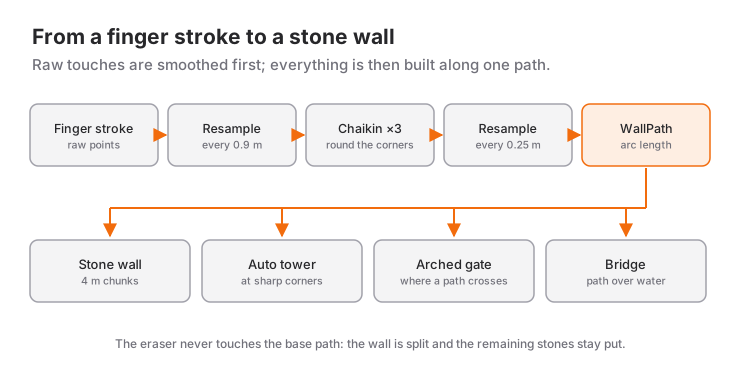
Touch input is messy. Swipe fast and the samples are sparse; swipe slowly and they bunch up. Your hand also shakes a little. A wall built directly on those points would carve every wobble into stone. The agent's fix is three lines in main.gd (_shape_stroke):
pts = PathTools.resample(pts, 0.9)       # evenly spaced, 0.9 m apart
pts = PathTools.chaikin(pts, 3, closed)  # three rounds of corner cutting
pts = PathTools.resample(pts, 0.25)      # dense and even for everything downstream
The first line resamples the stroke to one point every 0.9 meters. Now the spacing no longer depends on how fast you moved, and small jitters simply fall between samples. The second line runs Chaikin's corner-cutting algorithm three times. The third resamples the result to a point every 25 centimeters, and every later calculation works on that array.
Chaikin is about as simple as smoothing gets: for each edge, keep the points at one quarter and three quarters of the way along, and drop the original corner. Each round rounds the corners a bit more, and after three rounds a hand-drawn line reads like a deliberate arc:
## Chaikin corner cutting. Open curves keep their end points.
static func chaikin(src: PackedVector2Array, iterations: int, closed: bool) -> PackedVector2Array:
	var p := src
	for it in iterations:
		var n := p.size()
		if n < 3:
			return p
		var q := PackedVector2Array()
		if not closed:
			q.append(p[0])
		var count := n if closed else n - 1
		for i in count:
			var a := p[i]
			var b := p[(i + 1) % n]
			q.append(a.lerp(b, 0.25))   # a quarter of the way along
			q.append(a.lerp(b, 0.75))   # and three quarters
		if not closed:
			q.append(p[n - 1])
		p = q
	return p
Two decisions happen before smoothing. If an end of the stroke lands near an existing tower or wall, it snaps to it, so two walls actually join. And if the stroke is longer than 8 meters and its ends are less than 2.5 meters apart, it counts as a closed loop. Players don't have to lift their finger at the exact spot where they started.
A path measured in meters: WallPath
The smoothed points are still just an array. To lay stones you need a fast answer to one question: "Where am I, and which way am I facing, s meters from the start?" wall_path.gd answers it with arc-length parameterization. It computes the running length up to each point (cum) once, then for any s it binary-searches the right segment and interpolates:
func pos(s: float) -> Vector2:
	if closed and length > 0.0:
		s = fposmod(s, length)        # wrap around a loop
	else:
		s = clampf(s, 0.0, length)
	var lo := 0
	var hi := pts.size() - 1
	while hi - lo > 1:                # binary search: which segment holds s?
		var mid := (lo + hi) >> 1
		if cum[mid] <= s:
			lo = mid
		else:
			hi = mid
	var seg := cum[hi] - cum[lo]
	if seg <= 0.00001:
		return pts[lo]
	return pts[lo].lerp(pts[hi], (s - cum[lo]) / seg)
The normal (the direction the wall faces) isn't taken from a single segment. It comes from the difference between the points 30 centimeters behind and 30 centimeters ahead of s. That centered difference keeps the normal from jumping at vertices, so the stones turn corners smoothly.
From here on, everything speaks in meters: a gate sits "12 meters along the wall," and a piece left by the eraser runs "from 3 to 7.5 meters."
Laying stones: a seed per course, a seed per stone
There are no imported 3D model files in Kalecik; every stone is a small grid generated in code. masonry.gd builds a wall course by course. Each course gets a random height between 30 and 42 centimeters (the bottom course is thicker), and each course is split into stones between 50 centimeters and 1 meter long. Openings such as gates are passed in as "holes," and no stones go there.
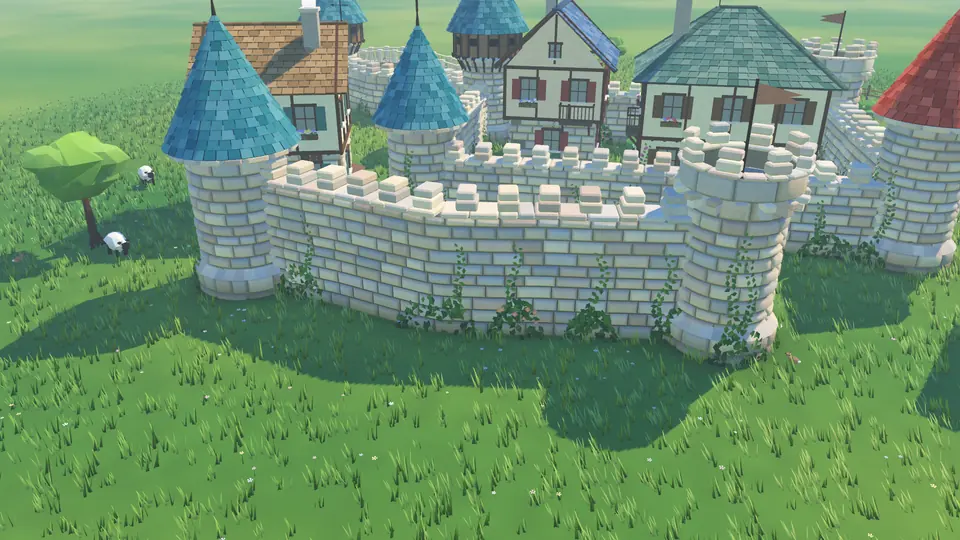
Walls laid stone by stone; each stone’s shape comes from its own seed.
The real trick is how the randomness is seeded. While you drag, the wall keeps growing and gets recomputed on every update. With a single random number generator, every stone would shift each time the wall got longer, and the wall would boil in front of you. Instead, every course and every stone has its own seed:
while y < y_top - 0.08:
	var h := course_rng.randf_range(0.30, 0.42)   # course height
	rng.seed = sd * 31 + row * 7919 + 17           # stone lengths for this course
	var spans := _row_spans(a, b, row_holes, 0.7 if row == 0 else 0.5, 1.25 if row == 0 else 1.0, rng)
	for k in range(0, spans.size(), 2):
		var sm := (spans[k] + spans[k + 1]) * 0.5
		if not _in_range(path, sm, s_from, s_to):
			continue                                # another chunk builds this stone
		# per-stone seed: the stone looks the same no matter which chunk builds it
		stone_rng.seed = sd * 131 + row * 104729 + k
		_stone(buf, path, side, off, spans[k] + GAP * 0.5, spans[k + 1] - GAP * 0.5, y + GAP * 0.5, y + h - GAP * 0.5, stone_rng)
	y += h
	row += 1
Because each course is split from the start of the path forward, a longer wall only changes the stones at the very end. Everything before that comes out identical: same seed, same order, same lengths. The speedup in the next section depends entirely on this property.
A single stone is a "pillow": a grid whose outer ring sinks back to the mortar while the face stands 8.5 centimeters proud, with a slight random tilt and a color picked from a handful of stone tones and nudged a little. A 3.5-centimeter mortar joint separates neighbors. Under real shadows, that's enough to read as hand-laid masonry.
Rebuilding only the tail while you draw
The first version rebuilt the entire wall on every drag update. Short walls were fine, but on a 50-meter wall a single update took 80 ms on an M1 Mac, far too slow for smooth drawing. The fix was to cut walls into 4-meter chunks (castle_view.gd):
const CHUNK := 4.0
const TAIL := 4.0   # while drawing, only this last stretch can still change shape

func preview_update(path: WallPath, sd: int, opts: Dictionary) -> void:
	var n := maxi(1, ceili(path.length / CHUNK))
	var jobs := []
	for k in range(_preview_stable, n):   # skip chunks that are already final
		jobs.append(_chunk_job(path, sd, k * CHUNK, minf(path.length, (k + 1) * CHUNK), "", opts))
	var built := _run_jobs(jobs)
	# ... the new meshes replace the old chunks in the scene
	_preview_stable = clampi(floori((path.length - TAIL) / CHUNK), 0, n)
As your finger moves on, chunks more than 4 meters behind it are marked stable and never rebuilt; each update only re-lays the tail. The per-stone seeds make that safe, because a stable chunk looks exactly the way it would if the whole wall were rebuilt from scratch. On the same machine, live updates dropped to 8 ms on average and 11 ms at worst. All of these numbers were measured on an M1 Mac; I don't have phone measurements.
Finished walls follow the same idea. Each chunk mesh is cached under a key made of the base path, the chunk index, its range and the wall's signature (kind, height, gates, stairs, anything that affects the stones). An edit rebuilds only the chunks whose signature changed. Up to 150 unused chunk meshes stay in the cache for undo and redo, so undoing doesn't re-lay the wall; it comes straight from the cache. How large rebuilds get spread across worker threads, and why the phone ran hot, is covered in the Godot mobile performance post.
Towers and the eraser
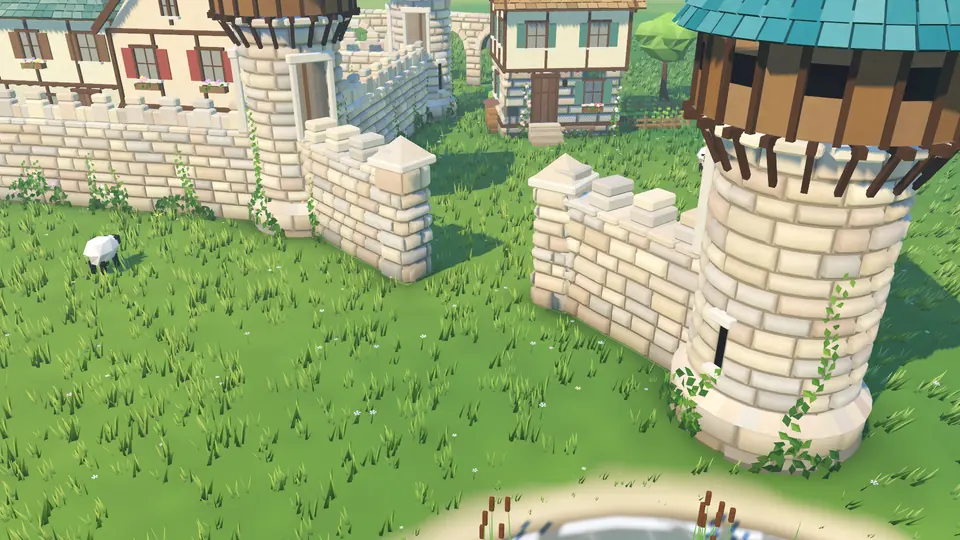
The eraser splits the wall; the open ends get stone piers.
Where towers go
When you finish drawing a wall, towers appear on their own: at both ends of an open wall, where two stone walls cross, and at sharp corners. To find corners, the agent walks along the path every half meter and compares the heading 2 meters behind with the heading 2 meters ahead. Turns sharper than 60 degrees become candidates, the candidates are sorted by sharpness, and among any that are closer than 5.5 meters, only the sharpest survives:
## Straight-ish stretches get no towers; real corners do.
func _corner_spots(path: WallPath) -> Array:
	var cand := []
	var s := 0.0 if path.closed else 3.0   # open walls get separate end towers
	var s_end := path.length if path.closed else path.length - 3.0
	while s < s_end:
		var a := path.pos(s - 2.0)
		var b := path.pos(s)
		var c := path.pos(s + 2.0)
		var ang := absf((b - a).angle_to(c - b))
		if ang > deg_to_rad(60.0):
			cand.append([s, ang])
		s += 0.5
	cand.sort_custom(func(x, y): return x[1] > y[1])   # sharpest corner first
	var out := []
	for cd in cand:
		var ok := true
		for o in out:
			var d := absf(float(o) - float(cd[0]))
			if path.closed:
				d = minf(d, path.length - d)
			if d < 5.5:   # too close to a tower we already placed
				ok = false
				break
		if ok:
			out.append(cd[0])
	return out
The rule is cautious on purpose. When I first tried it on the phone, a quick scribble turned into a pile of towers, and my feedback was basically "silly auto towers." The angle threshold, the spacing rule and the "Auto tower" switch in the settings all came after that. A tower's height, radius and roof are picked from its seed and can be changed later with a tap. There are four roof types: a shingle cone, a wooden gallery, a crenellated crown and a square tower with a pyramid roof.
The eraser: splitting walls without moving a stone
The eraser is where procedural geometry usually struggles. If you erase the middle of a wall, you don't want the two remaining halves recomputed with their stones reshuffled. It should look like a gap someone opened on purpose, not like the castle collapsed. castle.gd solves this with its data model. The village is stored as plain data, and meshes are always rebuilt from it. A wall is the stretch [s0, s1] of a base path:
var bases := {}          # id -> {pts, closed, seed, kind, height, gates: Array}
var walls: Array = []    # {id, base, s0, s1}
The eraser never touches the base path. It samples the piece every 20 centimeters, marks the samples under the brush and keeps each run of uncovered samples as a new piece, dropping crumbs shorter than 60 centimeters. On a closed loop, the runs on either side of the start point are merged back into one piece. Since stones are derived from the base path and the seed, every surviving stone stays exactly where it was. Gates are stored on the base path in meters too, so splitting doesn't affect them.
There's a nice side effect: undo and saving are just copies of a few arrays. The mesh cache takes care of the rest.
A path through a wall becomes a gate; a path over water becomes a bridge
This is my favorite rule in Kalecik: a structure adapts to what runs through it. To find where two lines cross, PathTools.crossings runs the classic segment-segment intersection test on every pair of segments and returns each hit as a distance along the wall. When you draw a wall:
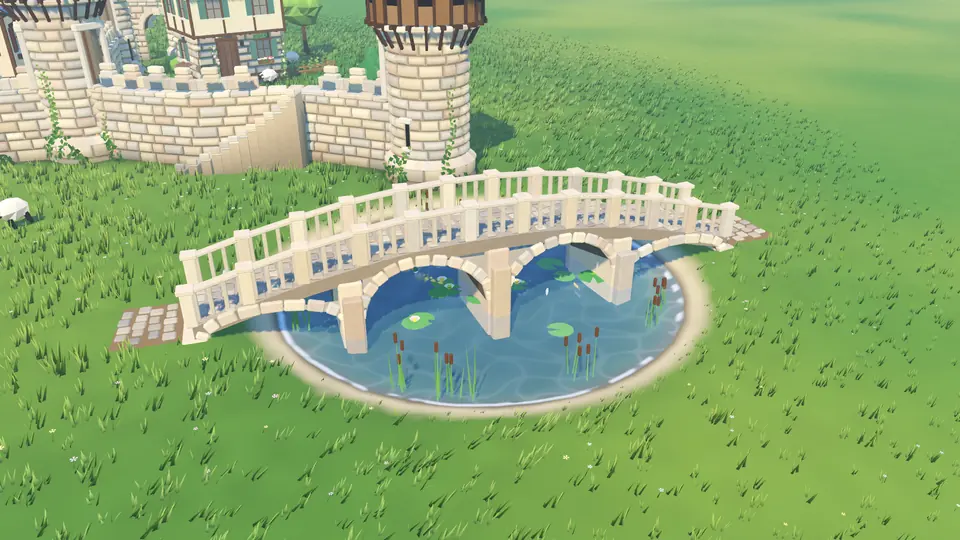
A path drawn over the pond turned into a stone bridge with stairs.
# a stone wall drawn across a path or house gets an arch ("geçit")
if kind in Castle.STONE_KINDS:
	for bid in _bases_of_kind("path"):
		for s in PathTools.crossings(castle.bases[bid].pts, shaped.pts, shaped.closed):
			castle.add_gate(w.base, s)
Drawing a path runs the same test the other way around. add_gate rejects some gates: none within 1.6 meters of an open wall's end, and at least 3 meters between two gates. The masonry code then passes the gate's 2-meter span as a hole to every course up to the gate's height and builds the arch on top.
For bridges, the question isn't "where does it cross" but "where is it wet." _split_at_water samples the path every 25 centimeters and flags samples where the terrain sits below the water line. Wet runs are then grown by 1.5 meters onto each bank, so the bridge starts on dry land rather than at the water's edge. Dry stretches stay cobbled path; wet stretches become bridge. The deck rises into a gentle hump (bridge.gd):
## The deck rises to a gentle hump in the middle, so arches have room and it reads as a bridge.
static func hump(L: float) -> float:
	return clampf(L * 0.09, 0.3, 1.5)

static func deck_at(base: float, s: float, L: float) -> float:
	return base + hump(L) * sin(clampf(s / L, 0.0, 1.0) * PI)
The hump is 9 percent of the bridge's length, but never less than 30 centimeters or more than 1.5 meters. Piers go in roughly every 3.6 meters with arches between them, a stone or wooden railing runs along both edges, and if the deck ends above the ground, stairs lead down.
The stairs taught a useful lesson. At first their direction came from the path's normal. But which side a normal points to says nothing about which way the deck runs, and as a result every flight of stairs turned back under the bridge. The fix was to take the direction from the line itself: the difference between the end point and a point 30 centimeters inside. The arch stones that looked "like falling blocks" were a similar geometry bug, fixed by aligning each stone to the tangent and normal of the ellipse.
From a scribble to a house: the minimum bounding rectangle
The house tool doesn't use the shape you draw directly; it uses the tightest rectangle around it. PathTools.min_rect first takes the convex hull of the points. Then it treats each hull edge in turn as an axis, projects every point onto that axis and its perpendicular, and keeps the box with the smallest area:
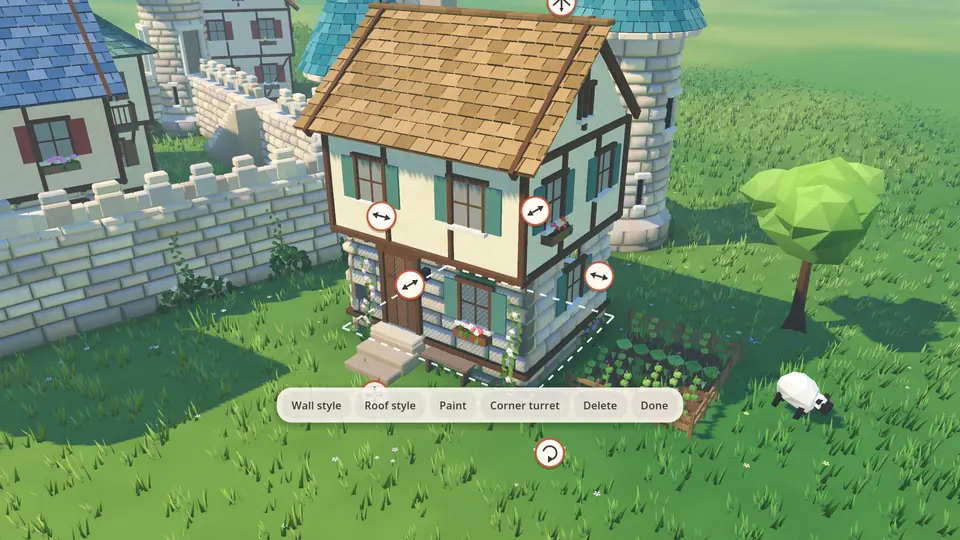
A house fitted to the drawn area; tap it for handles and the edit menu.
static func min_rect(src: PackedVector2Array) -> Dictionary:
	var h := hull(src)                      # convex hull
	var best := {}
	var best_area := INF
	for i in h.size():
		var e := h[(i + 1) % h.size()] - h[i]
		if e.length_squared() < 1e-8:
			continue
		var u := e.normalized()             # this edge is one axis
		var v := Vector2(-u.y, u.x)         # and its perpendicular is the other
		var lo := Vector2(INF, INF)
		var hi := Vector2(-INF, -INF)
		for p in h:
			var q := Vector2(p.dot(u), p.dot(v))   # project onto both axes
			lo = Vector2(minf(lo.x, q.x), minf(lo.y, q.y))
			hi = Vector2(maxf(hi.x, q.x), maxf(hi.y, q.y))
		var size := hi - lo
		if size.x * size.y < best_area:
			best_area = size.x * size.y
			var mid := (lo + hi) * 0.5
			best = {center = u * mid.x + v * mid.y, angle = u.angle(), w = size.x, d = size.y}
	return best
This works because one side of the minimum-area rectangle always lies along an edge of the convex hull. Instead of trying every angle, you only have to try the hull's edges.
The dimensions snap to 25 centimeters and get clamped to the allowed range. A plain tap gives you a default cottage. The door always goes on the side facing the camera. A house drawn straight on from the end of another house, at the same depth, merges with it and makes it longer; one drawn at a right angle attaches as an L or T wing. And a house drawn across a stone wall opens an arched passage in the wall and becomes a gatehouse.
Who set the rules, and how they were tested
The first files (wall_path.gd, path_tools.gd, masonry.gd) appeared fourteen minutes after my first message. Half an hour in, there was a demo on the Mac: draw a line, get a stone wall and an automatic tower. Houses and paths that open arched gates arrived the same night; bridges and bridge joins came in later rounds. My part was to say what should happen and to test the result on the phone. The feedback about silly auto towers, bridge ends and bridges connecting to each other came from me, along with a blunt message that roughly translates to "the procedural modeling has serious gaps." The fixes came from the agents.
The agents tied each rule to a scripted test built into the game. It draws walls, paths and houses with fake touches, then verifies checks such as "a path through a wall opened a gate," "a path across the pond became a bridge" and "the eraser cut the courtyard, the loop is open." If a change breaks a rule, the test catches it before the game is ever installed on a phone.
Kalecik is in development for iPhone and iPad. Version 1.0 is being prepared for App Store review, and an Android version for Google Play is on the way. It's a one-time purchase with no ads, and it works fully offline. If you'd like to draw these walls with your own finger, the store links will be on the Kalecik page once they're live. The game's sound was also generated entirely in code, without a single recording; that's the subject of the post on generating game music and sound with code.
Frequently Asked Questions
What is Chaikin's algorithm, and why not Bézier curves?
Chaikin's algorithm smooths a polyline by keeping the points a quarter and three quarters of the way along each edge and cutting off the corners. Bézier curves need control points chosen for them; Chaikin works directly on the points you already have and fits in a few lines. For cleaning up a hand-drawn stroke, that's all you need.
Does Kalecik use any pre-made 3D models?
No. All of the geometry, including stones, towers, bridges and houses, is generated in code. There are no pre-made or AI-generated 3D model files in the game.
Why don't the stones shift while a wall is growing?
Every stone's randomness comes from its own seed: the wall's seed, the course number and the stone's position in that course. When the wall grows, only the last stones change length; everything before them comes out the same. That's why rebuilding just the last 4 meters is enough while you draw.
When is Kalecik coming out, and on which platforms?
Kalecik is for iPhone and iPad. The App Store version is coming soon, and a Google Play version is in the works. It's a one-time purchase with no ads, subscriptions or in-app purchases, and it plays offline. The current status is on the Kalecik page.
Related Posts
Royalty-Free Game Music: Generating Every Sound in Code
Kalecik uses no recordings: stones, birds, sheep and 37 music pieces were all generated in Python. No loops, a music watchdog, and LUFS instead of ears.
The Game That Heated My iPhone: Godot Mobile Performance
My Godot game made an iPhone 15 Pro Max hot. The root cause was 120 fps; the fixes were a frame-rate governor, shadow proxies, grass chunks and threads.
Building a Mobile Game with AI Agents: Kalecik
From an empty folder to an iPhone: how I made Kalecik by directing five parallel Claude Code sessions, what I decided myself, and where we hit walls.